
Recording Orders and Costs Follow
At this stage of the process, all of the necessary information to ensure that your production schedule is being used accurately is all in place. If you are completing these next and final steps, then you are most likely managing the finer details of a production schedule.
Orders Tab:
Once the details of the printing have been negotiated and confirmed with the printer, you should record information in the Orders tab so you know where the copies of the book will be delivered. In some cases, you may be printing copies for a particular retailer. In the example below, we have recorded two orders. One is for an order to a retailer in America, whilst the other is the normal stock order for the publishing company itself. This is how you can record the quantities that will be shipping to your warehouse.
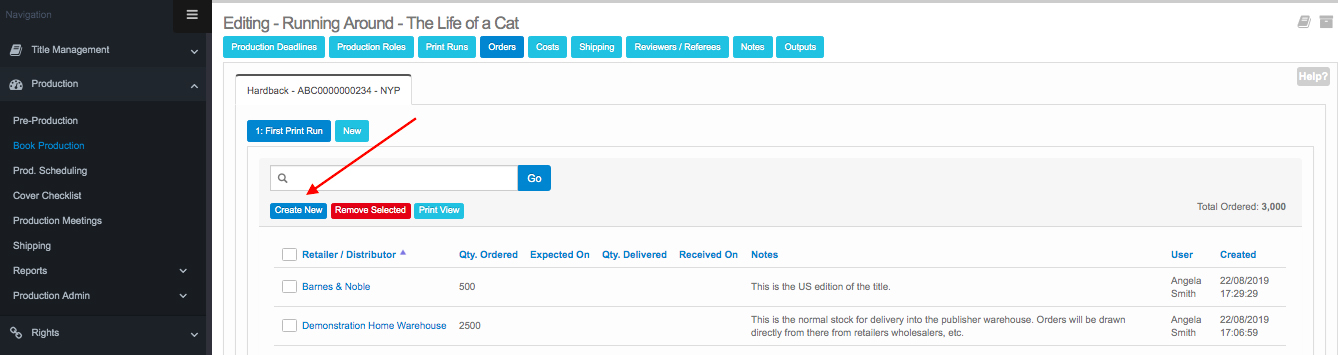
Adding a new order:
1) Click on the Create New button, which we have pointed out above with the red arrow. The following pop up screen will then be displayed on your system:
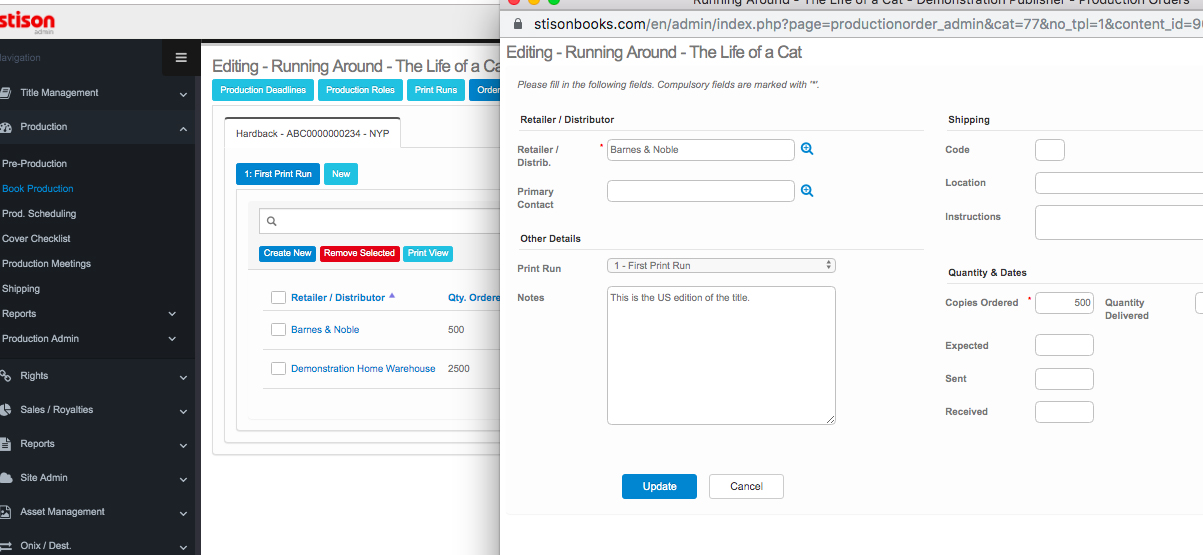
2) The items with the red * are the items that must be added if you want to record an order. In the example above, we have input the retailer's name and the copies ordered.
3) When you are finished adding your information, click the Update button and move to the next step.
Costs Tab:
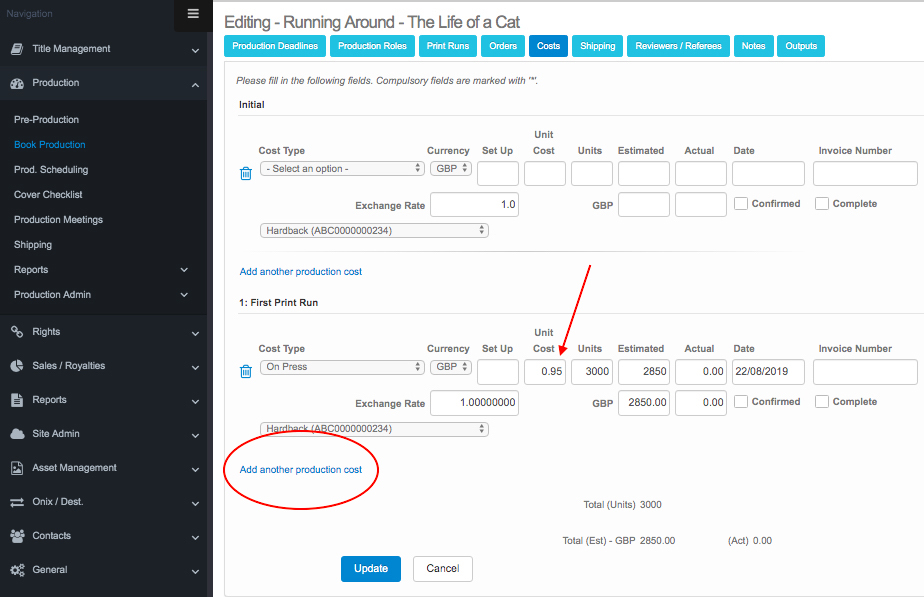
The first item that appears in this tab will automatically be populated when the unit cost is added in the Print Runs tab. We've identified the relevant item below with the red arrow.
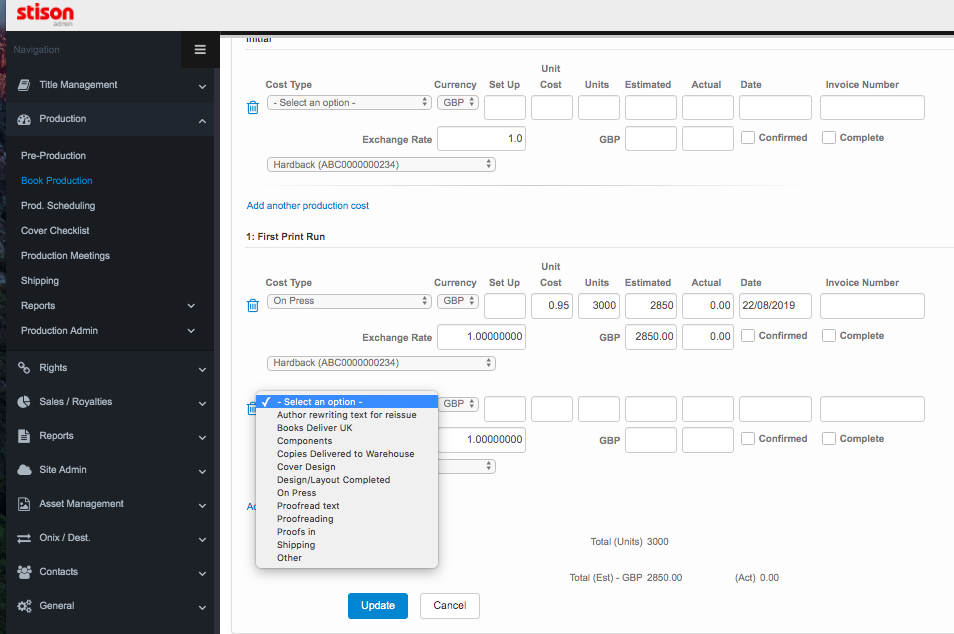
1. Cost Type: The drop-down menu will pull in the items you marked as costs when adding them in tasks/costs. You may find in the future that a Cost Type you want to record is not yet in the menu. In order to ensure that it is, go back to Beginning to Use Production Manager or Setting Up Production Tasks/Costs.
2. Please note that the costs input earlier were initially an estimation. The information will automatically be filtered through to here where you can now confirm it. Record the Actual cost, the Date and tick Confirmed. Once you tick 'confirmed,' the information will then be fed through to the Print run tab. It will also appear within the P&L tab of the title's record in your Title Management module.
3. To add more costs, whatever they might be, click on "Add another production cost," which we have marked with a red oval above. When you do so, another set of blank fields will be displayed on the screen. Repeat items 1-2 from above. You'll notice in the example below that cost is set up against the HB. You may find that you have several formats printing at the same time under the same project. Here is where you will ensure that the individual costs are allocated against the accurate formats. This ensures the reporting functionality over in Title Management is accurate to the forms.
4. Once you have finished adding all of the costs associated with this print run, click on to the Update button to store the information.
You are now ready to move onto: Linking Outputs. You will do this if your production schedule includes different formats of the same content. If it does not, then you may be interested in reviewing further information about how to view information in Production Manager.
Comments
0 comments
Please sign in to leave a comment.